
3.8
Owner's of the AT&T Answering Machine 984 gave it a score of 3.8 out of 5. Here's how the scores stacked up:


Feature setup
Feature setup
32
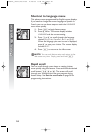
Set the time and date
1. Press E to begin feature setup.
2. Press - until the screen display includes
TIME/DATE.
3. Press E. The screen display includes
HOUR and the current hour setting.
4. Press < or > until the correct hour is shown.
5. Press - to save the hour setting. The screen
display includes MINUTE and the current
minute setting.
6. Press < or > until the correct minute is
shown.
7. Press - to save the minute setting. The
screen display includes AM/PM and the current
setting.
8. Press < or > to toggle between AM and PM.
9. Press - to save the AM/PM setting. The
screen display includes MONTH and the
number of the current month setting.
10. Press < or > until the number of the correct
month is shown.
11. Press - to save the correct month setting.
The screen display includes DATE and the
current day of the month setting.
12. Press < or > until the correct day of the
month is shown.
13. Press - to save the day of the month. The
screen display includes DAY OF WEEK and
the current setting.
14. Press < or > until the correct day of the
week is shown.
15.
Press - to save the time/date setting. The
screen display includes MAIN MENU.
16. Press and hold E to return to the idle
screen.
NOTE: In setting the 29th day of February (which
runs every four years), you can first set the month and
day to either Jan 29 or Mar 29, DO NOT switch the
date item, and then ONLY change the month to Feb.
The LCD on the base unit will show Feb 29 after
setting.
NOTE: You can exit feature setup and return to the
idle screen any time. Simply press and hold E.
i
ii
ii
k
kk
kk
o
oo
oo
n
nn
nn
984CIB_(Rev3)28.04.06 4/28/06 6:28 PM Page 32


Find Your Products By Category
- Computer Equipment
- Portable Media
- Photography
- Car Audio and Video
- TV and Video
- Household Appliance
- Automotive
- Communications
- Kitchen Appliance
- Laundry Appliance
- Home Audio
- Lawn and Garden
- Power Tools
- Musical Instruments & Equipment
- Baby
- Personal Care
- Video Game
- Marine Equipment
- Fitness & Sports
- Outdoor Cooking
- Cell Phone
Please Login
