
0
Owner's of the Black & Decker Automobile Battery Charger Black & Decker Automobile Battery Charger gave it a score of 0 out of 5. Here's how the scores stacked up:

7
Charging/Recharging Using the 120 Volt AC Charger and
a Standard Household Extension Cord (not included)
1.Lift the AC adapter cover located on the front of the unit and connect an extension cord to the unit. Plug the
other end of the cord into a standard 120 volt AC wall outlet.
2.Charge until three Red and one Green LED Battery Status Indicators light or flash.
3.Once fully charged, disconnect the extension cord.
Note:
The unit cannot be overcharged using the AC method.
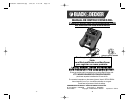
JUMP-STARTER
This Jump-Starter is equipped with an ON/OFF Power Switch. Once the connections are properly made, turn the
switch ON to jump-start the vehicle.
1.Turn OFF vehicle ignition and all accessories (radio, A/C, lights, connected cell phone chargers, etc.). Place
vehicle in “park” and set the emergency brake.
2.Make sure the Jump-Starter Power Switch is turned to OFF.
3.Remove jumper clamps from clamp tabs. Connect the red clamp first, then the black clamp.
4.Procedure for jump-starting a NEGATIVE GROUNDED SYSTEM (negative battery terminal is connected to chassis)
(MOST COMMON)
4a.Connect positive (+) red clamp to vehicle battery’s positive terminal.
4b.Connect negative (–) black clamp to chassis or a solid, non-moving, metal vehicle component or body
part. Never clamp directly to negative battery terminal or moving part. Refer to the automobile owner’s
manual.
5.Procedure for jump-starting POSITIVE GROUND SYSTEMS
Note:
In the rare event that the vehicle to be started has a Positive Grounded System (positive battery terminal is
connected to chassis), replace steps 4a and 4b above with steps 5a and 5b, then proceed to step 6.
5a.Connect negative (–) black clamp to vehicle battery’s negative terminal.
5b.Connect positive (+) red clamp to vehicle chassis or a solid, non-moving, metal vehicle component or body
part. Never clamp directly to Positive battery terminal or moving part. Refer to the automobile owner’s
manual.
6.When clamps are connected properly, turn the Jump-Starter Power Switch to ON.
7.Turn ON the ignition and crank the engine in 5-6 second bursts until engine starts.
8.Turn the Jump-Starter Power Switch back to the OFF position.
9.Disconnect the negative (–) engine or chassis clamp first, then disconnect the positive (+) battery clamp.
FOLLOW ALL SAFETY INSTRUCTIONS FOUND IN THIS MANUAL.
CAUTIONS: RISK OF PROPERTY DAMAGE
•If the connections to the battery’s positive and negative terminals are incorrect, the Reverse Polarity Indicator
will light (red) and the unit will sound a beep. Disconnect clamps and reconnect to battery with correct polarity.
•If vehicle fails to start, turn OFF the ignition, turn OFF the Jump-Starter Power Switch, disconnect the jump-start
system’s leads and contact a qualified technician to investigate why the engine did not start.
•Recharge this unit fully after each use.
WARNINGS
•Jump-Starter Power Switch should be off prior to jump-starting.
•This power system is to be used ONLY on vehicles with 12 volt DC battery systems.
•Never touch red and black clamps together — this can cause dangerous sparks, power arcing, and/or explosion.
•Vehicles that have on-board computerized systems may be damaged if vehicle battery is jump-started. Before
jump-starting this type of vehicle, read the vehicle manual to confirm that external-starting assistance is advised.
•Excessive engine cranking can damage the vehicle‘s starter motor. If the engine fails to start after the
recommended number of attempts, discontinue jump-start procedure and look for other problems that need to
be corrected.
•After use, turn the Jump-Starter Power Switch OFF.
•Replace worn or defective parts immediately — contact the Customer Service Department toll free
1-800-544-6986.
LED AREA LIGHT
The area light is controlled by the Area Light Power Switch on the front panel of the unit. Make sure the lamp is
turned OFF when the unit is being recharged or stored.
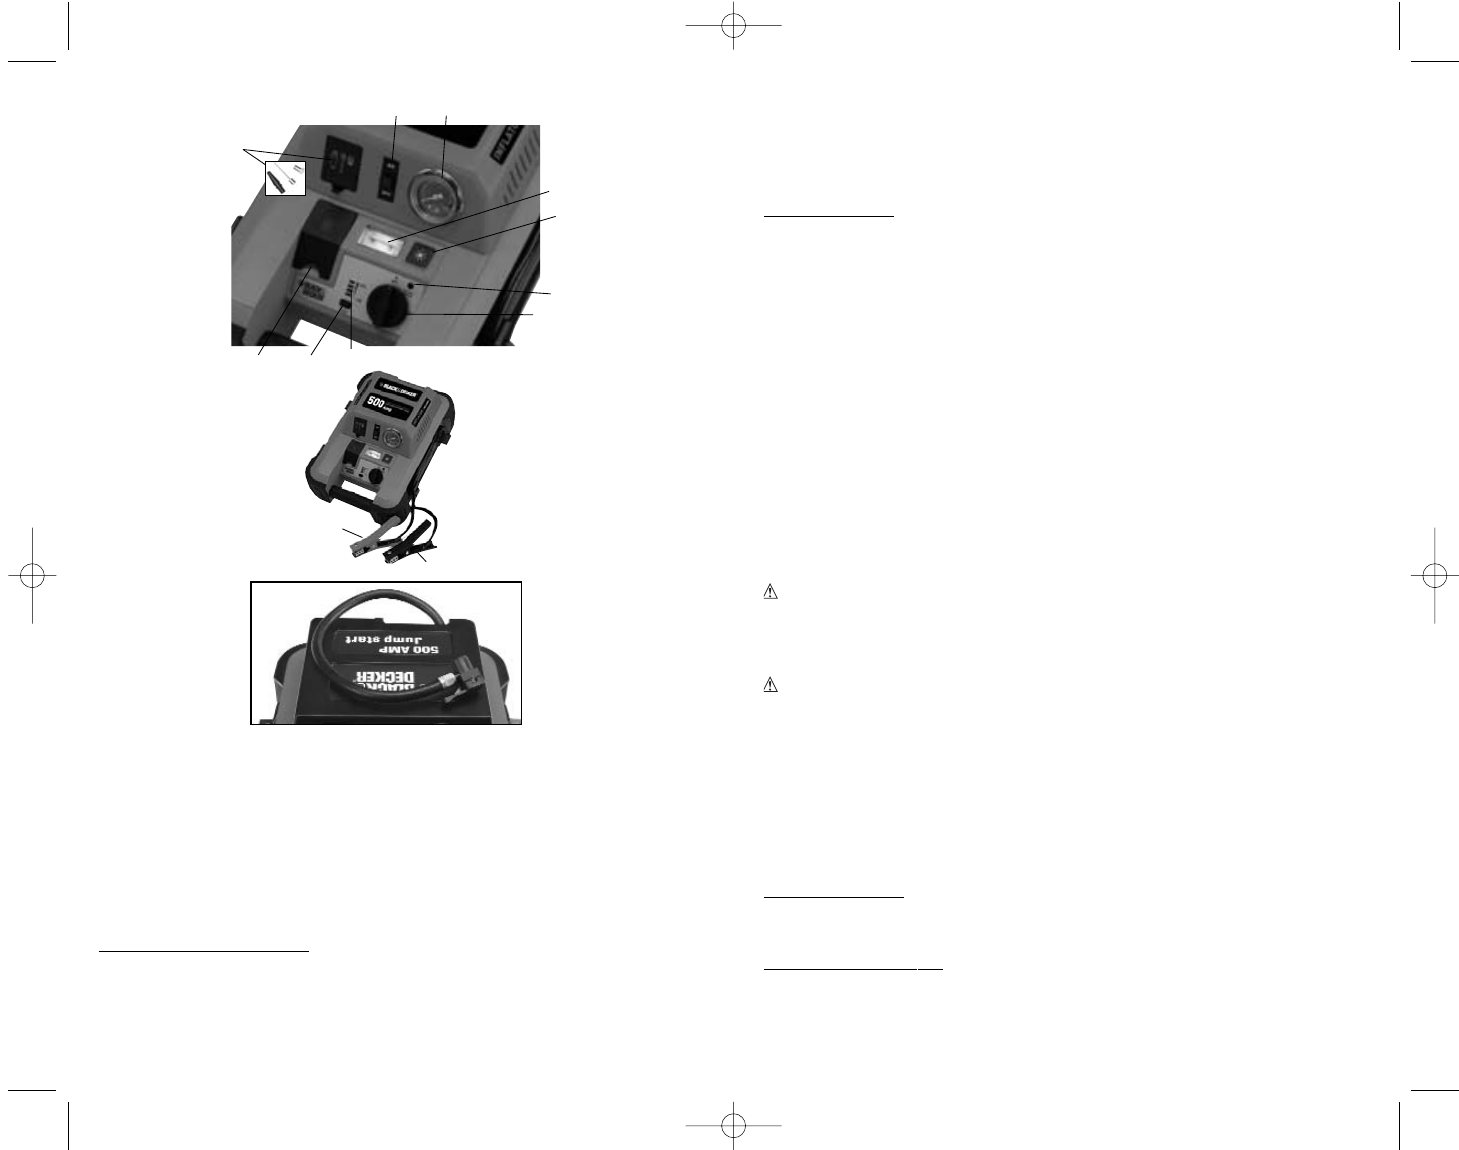
PORTABLE INFLATOR
The built-in 12 volt DC inflator is the ultimate inflator for all vehicle tires, trailer tires and recreational inflatables.
Three different sized nozzles are supplied. Each nozzle will clip on the end of the standard tire valve connector
located at the free end of the inflator hose. The inflator nozzles are stored inside the storage hatch on the top of
the unit. The inflator hose with tire fitting is stored in a retaining channel on the bottom of the unit. The ON/OFF
6
1
2
3
8
9
11
12
13
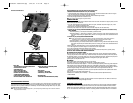
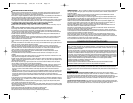
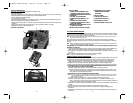
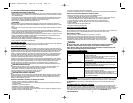
TOP OF UNIT
1.INFLATOR NOZZLE TIPS AND STORAGE HATCH
2.INFLATOR ON/OFF SWITCH
3.PRESSURE GAUGE
4.BUILT-IN LED AREA LIGHT
5.AREA LIGHT POWER SWITCH
6.REVERSE POLARITY INDICATOR
7.JUMP-STARTER POWER SWITCH
8.LED BATTERY STATUS INDICATORS
9.BATTERY CHARGE LEVEL PUSHBUTTON
10.BUILT-IN 120 VOLT AC CHARGER (UNDER
PROTECTIVE COVER)
SIDES OF UNIT
11.POSITIVE (+) RED CLAMP
12.NEGATIVE (–) BLACK CLAMP
BOTTOM OF UNIT
13.INFLATOR HOSE AND CONNECTOR (CHUCK)
Controls and Indicators
CHARGING/RECHARGING
This product has a sealed lead acid battery. For maximum battery life, we recommend the Jump-Starter be kept
fully charged at all times. Recharge before first use, immediately after each use, and once a month if not used.
Failure to do this may reduce the battery life dramatically. To check the battery charge status at any time, press
the Battery Charge Level Pushbutton.
Note:
This unit is delivered in a partially charged state – you must fully charge it before using it for the first time. Initial AC
charge should be for 24 hours.
4
5
6
7
10
90546624 JUS500IB.qxp 1/28/09 2:07 PM Page 6


Find Your Products By Category
- Computer Equipment
- Portable Media
- Photography
- Car Audio and Video
- TV and Video
- Household Appliance
- Automotive
- Communications
- Kitchen Appliance
- Laundry Appliance
- Home Audio
- Lawn and Garden
- Power Tools
- Musical Instruments & Equipment
- Baby
- Personal Care
- Video Game
- Marine Equipment
- Fitness & Sports
- Outdoor Cooking
- Cell Phone
Please Login
