
0
Owner's of the Bosch Appliances Security Camera Bosch Appliances Security Camera gave it a score of 0 out of 5. Here's how the scores stacked up:


IP Camera 200 Series Installation | en 19
Bosch Security Systems Installation and Operation Manual AR18-10-B012 | v1.5 | 2011.01
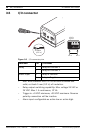
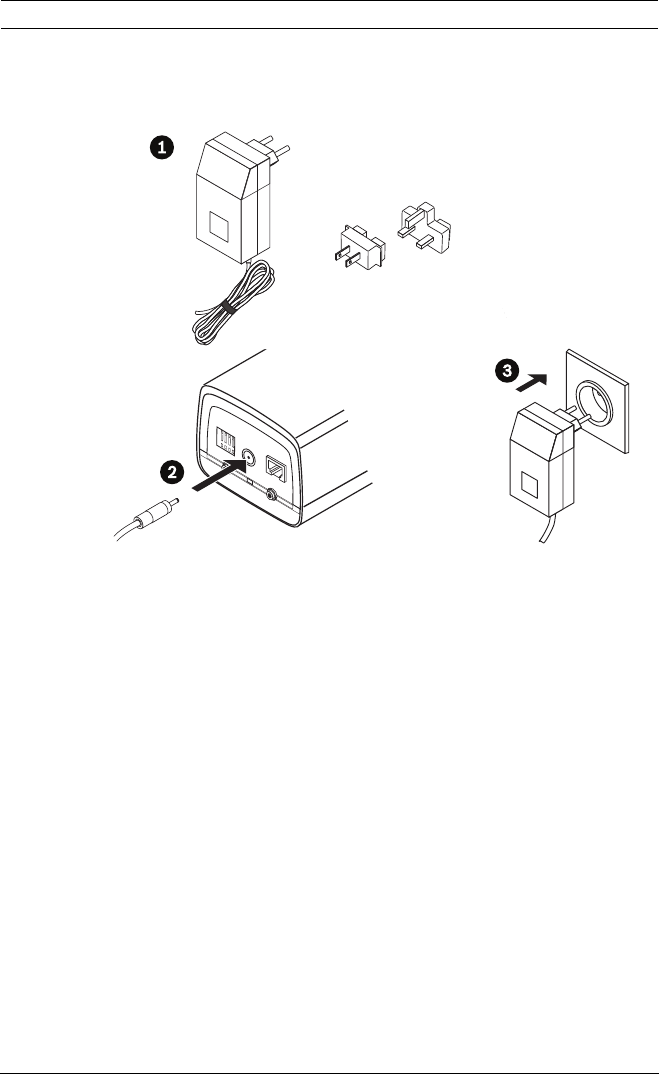
3.4 Power connection
3.4.1 DC power connection
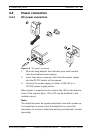
Figure 3.4 DC power connection
1. Slide the plug adapter that matches your outlet socket
onto the supplied power supply.
2. Insert the power connector jack from the power supply
into the DC12V socket of the camera.
3. Connect the power supply to either a 230 VAC or a
120 VAC power supply outlet.
When power is supplied to the camera the LED on the bottom-
front of the camera lights. (This LED can be disabled in the
Installer menu.)
Note:
The date/time must be synchronized each time after power on.
It is important to ensure that the date/time is correct for
recording. An incorrect date/time setting could prevent correct
recording.
1 2 3 4
DC12V Ethernet
Line-out Reset
Line-in
I/O


Find Your Products By Category
- Computer Equipment
- Portable Media
- Photography
- Car Audio and Video
- TV and Video
- Household Appliance
- Automotive
- Communications
- Kitchen Appliance
- Laundry Appliance
- Home Audio
- Lawn and Garden
- Power Tools
- Musical Instruments & Equipment
- Baby
- Personal Care
- Video Game
- Marine Equipment
- Fitness & Sports
- Outdoor Cooking
- Cell Phone
Please Login
