

4.3
Owner's of the Brother Sewing Machine XL 2600i gave it a score of 4.3 out of 5. Here's how the scores stacked up:
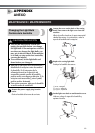
APPENDIX / ANEXO ————————————————————————————————————————————————
—
72
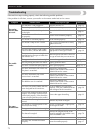
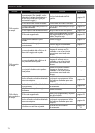
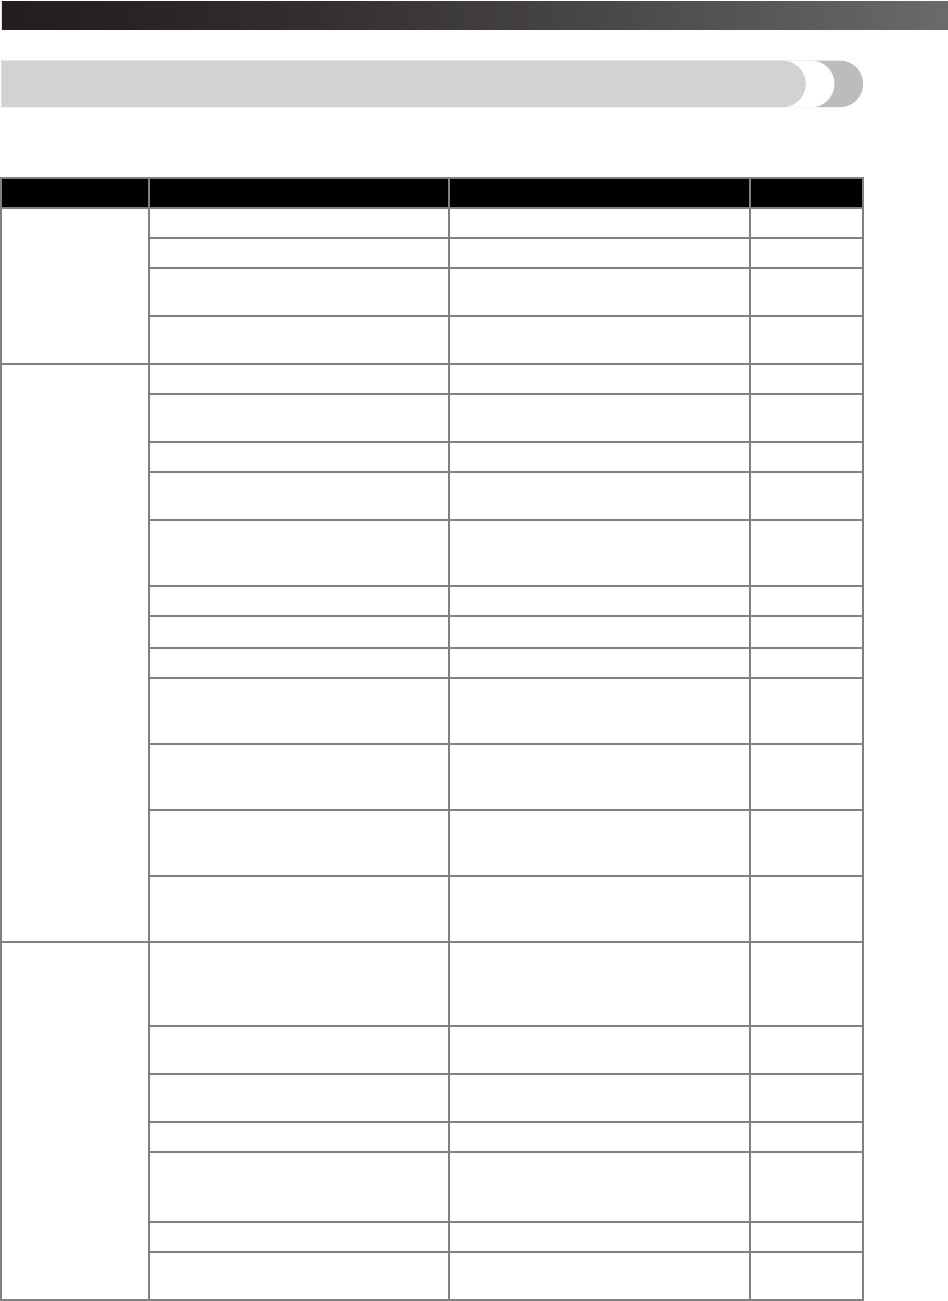
Troubleshooting
If the machine stops working properly, check the following possible problems.
If the problem is still there, contact your retailer or the nearest authorized service center.
Symptom Possible cause How to put it right Reference
The sewing
machine does
not work.
The machine is not plugged in. Plug the machine in. page 15
The main power switch is turned off. Turn on the main power switch. page 15
The bobbin-winder shaft is pushed
to the right.
Move the bobbin-winder shaft to the
left.
page 27
You have not used the foot control-
ler properly.
Use the foot controller properly. page 15
The needle
breaks.
The needle is not fitted properly. Fit the needle properly. page 16
The needle clamp screw is loose.
Use a coin or screwdriver to firmly
tighten the screw.
page 17
The needle is bent or blunt. Replace the needle. page 16
You have not used the right combi-
nation of fabric, thread and needle.
Choose a thread and needle that are
appropriate for the type of fabric.
page 39
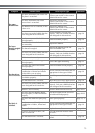
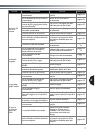
The presser foot you are using is not
appropriate for the type of stitch that
you want to sew.
Attach the presser foot that is correct for
the type of stitch that you want to sew.
–
The upper thread tension is too tight. Loosen the upper thread tension. page 38
You are pulling the fabric too much. Lightly guide the fabric.
–
You have not fitted the spool properly.
Fit the spool properly. page 32, 37
The area around the hole in the nee-
dle plate is scratched.
Replace the needle plate.
Contact your retailer or the nearest
authorized service center.
–
The area around the hole in the
presser foot is scratched.
Replace the presser foot.
Contact your retailer or the nearest
authorized service center.
–
The bobbin case is scratched.
Replace the bobbin case.
Contact your retailer or the nearest
authorized service center.
–
You have not used a bobbin that has
been designed for this machine.
Incorrect bobbins will not work
properly. Only use a bobbin that has
been designed for this machine.
page 26
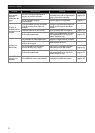
The upper
thread breaks.
You have not threaded the upper thread
properly. (For example, you have not fit-
ted the spool properly, or the thread has
come out of the guide above the needle.)
Correct the upper threading. page 32
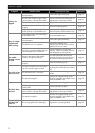
There are knots or tangles in the
thread.
Remove any knots or tangles.
–
The needle is not appropriate for the
thread you are using.
Choose a needle that is appropriate
for the type of stitch.
page 39
The upper-thread tension is too tight. Loosen the upper thread tension. page 38
The thread is tangled.
Remove the tangled thread. If the
thread is tangled in the bobbin case,
clean the bobbin case.
page 70
The needle is bent or blunt. Replace the needle. page 16
You have not inserted the needle
properly.
Insert the needle properly. page 17


Find Your Products By Category
- Computer Equipment
- Portable Media
- Photography
- Car Audio and Video
- TV and Video
- Household Appliance
- Automotive
- Communications
- Kitchen Appliance
- Laundry Appliance
- Home Audio
- Lawn and Garden
- Power Tools
- Musical Instruments & Equipment
- Baby
- Personal Care
- Video Game
- Marine Equipment
- Fitness & Sports
- Outdoor Cooking
- Cell Phone
Please Login
