

0
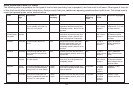
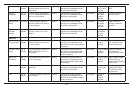
Owner's of the Cuisinart Bottle Warmer BFM-1000 gave it a score of 0 out of 5. Here's how the scores stacked up:


3
SPECIAL CORD SET INSTRUCTIONS
A short power supply cord is provided to reduce the risks of becom-
ing entangled in or tripping over a longer cord. Extension cords may
be used if care is exercised.
If an extension cord is used, the marked electrical rating of the exten-
sion cord should be at least as great as the electrical rating of the ap-
pliance. The longer cord should be arranged so that it will not drape
over the countertop or tabletop, where it can be pulled on by children
or tripped over unintentionally.
NOTICE
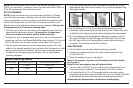
This appliance has a polarized plug (one prong is wider than the
other). As a safety feature, this plug will t into a polarized outlet only
one way. If the plug does not t fully in the outlet, reverse the plug. If
it still does not t, contact a quali ed electrician. Do not attempt to
defeat this safety feature.
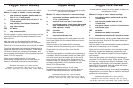
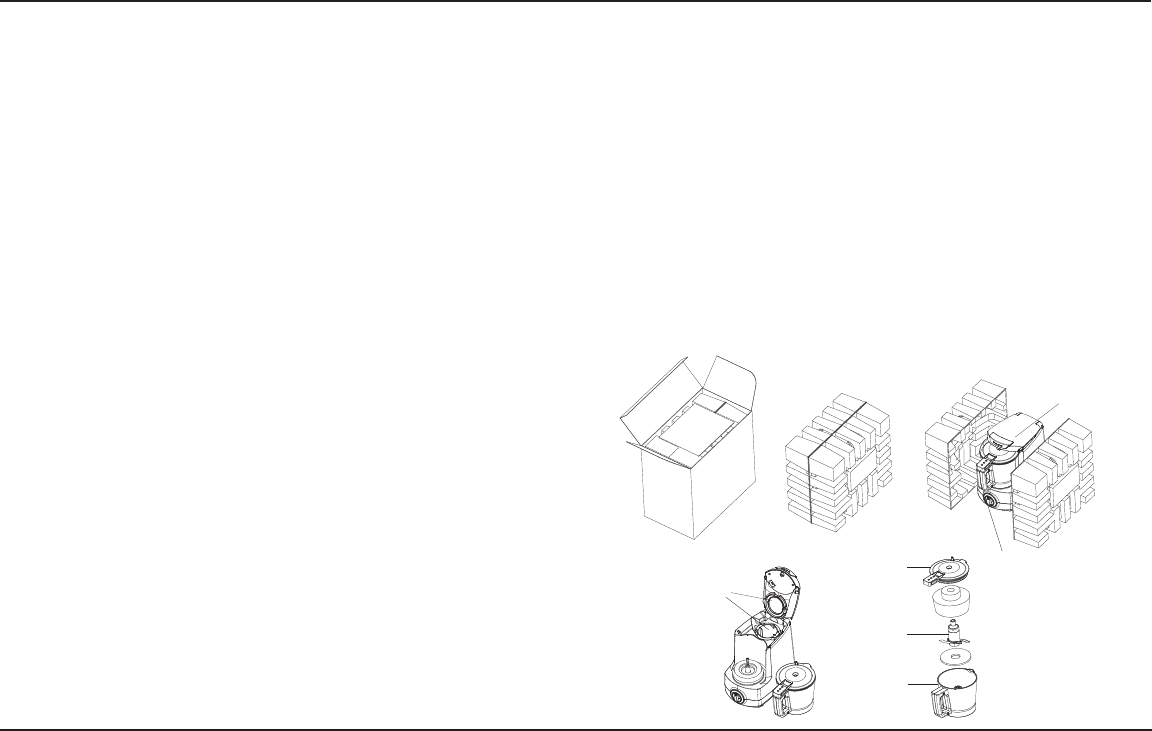
IMPORTANT UNPACKING
INSTRUCTIONS
This package contains a Cuisinart Baby
®
Food Maker & Bottle
Warmer, metal chopping/puréeing blade, measuring cup, adapter
ring, spatula and instruction/recipe book.
CAUTION: THE CUTTING BLADE HAS VERY SHARP EDGES.
To avoid injury when unpacking, please follow these instructions:
1. Place the box on a large, sturdy, at surface.
2. Open top aps and remove the instruction book, spatula and any
other literature.
3. Set the large panel of the gift box face down and slide the Baby
Food Maker & Bottle Warmer out of the box using the pulp tray.
Set the gift box aside.
4. Remove the Baby Food Maker and bottle warmer from the pulp
tray.
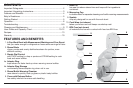
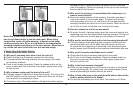
5. Open the unit cover
(
A
)
.You will see the Adaptor Ring (C) and the
measuring Cup (C) inside the housing. Keep them in their posi-
tions.
6. Grasp the bowl handle
(
B
)
, lift it off the housing, and remove
the polybag and packing materials from the housing.
7. Remove the bowl lid
(
D
)
from the bowl, and remove the foam
from inside the bowl (F). CAREFULLY REMOVE THE “STEAM
BLADE”
(
E
)
BY GRASPING THE CENTER HUB AND LIFTING IT
STRAIGHT UP. NEVER TOUCH THE BLADE, AS IT IS RAZOR
SHARP.
Remove the polysheet at the bottom of the bowl
(
F
)
.
8. We suggest you save all packing materials in the event that future
shipping of the machine is needed. Keep all plastic bags away
from children.
9. Rinse all accessories in warm soapy water before rst use.
10. Read the instructions thoroughly before using the machine.
C
C
D
D
B
B
A
A
E
E
F
F


Find Your Products By Category
- Computer Equipment
- Portable Media
- Photography
- Car Audio and Video
- TV and Video
- Household Appliance
- Automotive
- Communications
- Kitchen Appliance
- Laundry Appliance
- Home Audio
- Lawn and Garden
- Power Tools
- Musical Instruments & Equipment
- Baby
- Personal Care
- Video Game
- Marine Equipment
- Fitness & Sports
- Outdoor Cooking
- Cell Phone
Please Login
