
0
Owner's of the D-Link Marine Radio D-Link Unified Access Point Administrators gave it a score of 0 out of 5. Here's how the scores stacked up:

Unied Access Point Administrator’s Guide
Unied Access Point Administrator’s Guide
Page 35
March 2012
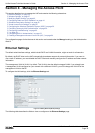
Section 4 - Managing the Access Point
Section 4 - Managing the Access Point
This section describes how to manage the UAP and contains the following subsections:
•) “Ethernet Settings” on page 35
•) “Wireless Settings” on page 37
•) “Modifying Radio Settings” on page 40
•) “Conguring Radio and VAP Scheduler” on page 44
•) “Scheduler Association Settings” on page 46
•) “Virtual Access Point Settings” on page 47
•) “Conguring the Wireless Distribution System (WDS)” on page 56
•) “Controlling Access by MAC Authentication” on page 59
•) “Conguring Load Balancing” on page 60
•) “” on page 61
•) “Conguring 802.1X Authentication” on page 63
•) “Creating a Management Access Control List (ACL)” on page 64
The conguration pages for the features in this section are located under the Manage heading on the Administration
Web UI.
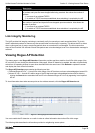
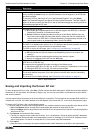
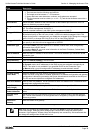
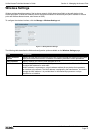
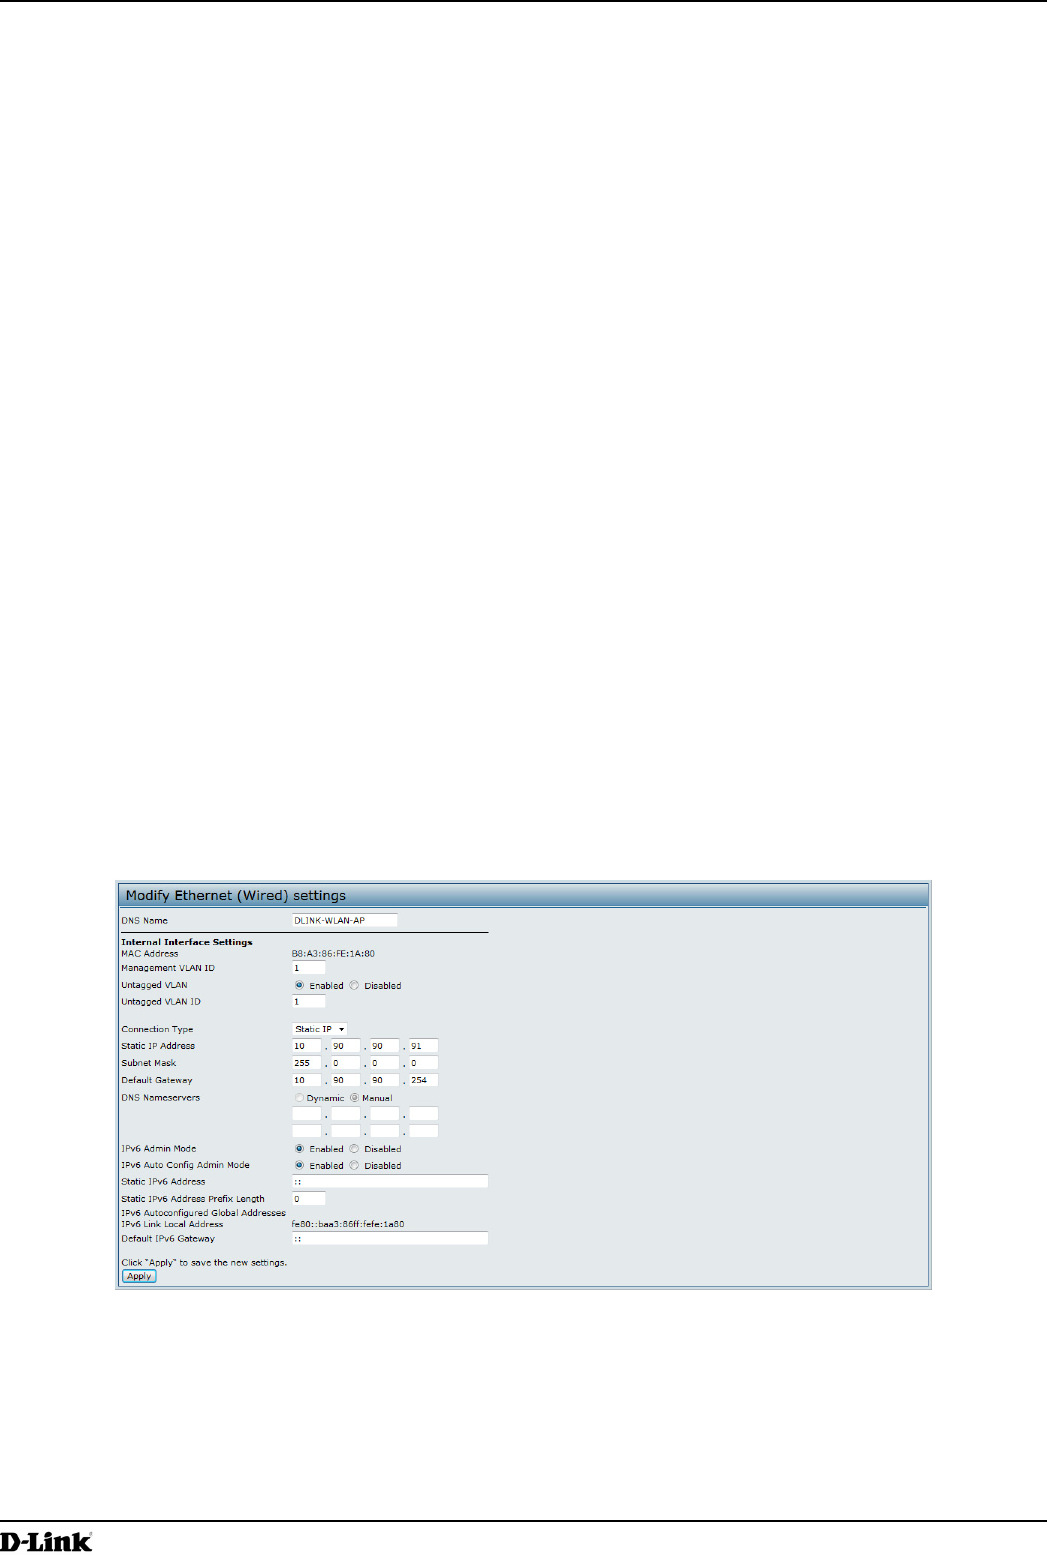
Ethernet Settings
The default wired interface settings, which include DHCP and VLAN information, might not work for all networks.
By default, the DHCP client on the UAP automatically broadcasts requests for network information. If you want to
use a static IP address, you must disable the DHCP client and manually congure the IP address and other network
information.
The management VLAN is VLAN 1 by default. This VLAN is also the default untagged VLAN. If you already have
a management VLAN congured on your network with a different VLAN ID, you must change the VLAN ID of the
management VLAN on the AP.
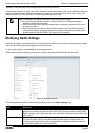
To congure the LAN settings, click the Ethernet Settings tab.
Figure 16 - Modify Ethernet (Wired) settings
The following table describes the elds to view or congure on the Ethernet Settings page.


Find Your Products By Category
- Computer Equipment
- Portable Media
- Photography
- Car Audio and Video
- TV and Video
- Household Appliance
- Automotive
- Communications
- Kitchen Appliance
- Laundry Appliance
- Home Audio
- Lawn and Garden
- Power Tools
- Musical Instruments & Equipment
- Baby
- Personal Care
- Video Game
- Marine Equipment
- Fitness & Sports
- Outdoor Cooking
- Cell Phone
Please Login
