
0
Owner's of the First Alert Baby Carrier NOT FOUND gave it a score of 0 out of 5. Here's how the scores stacked up:
3
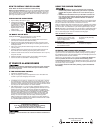
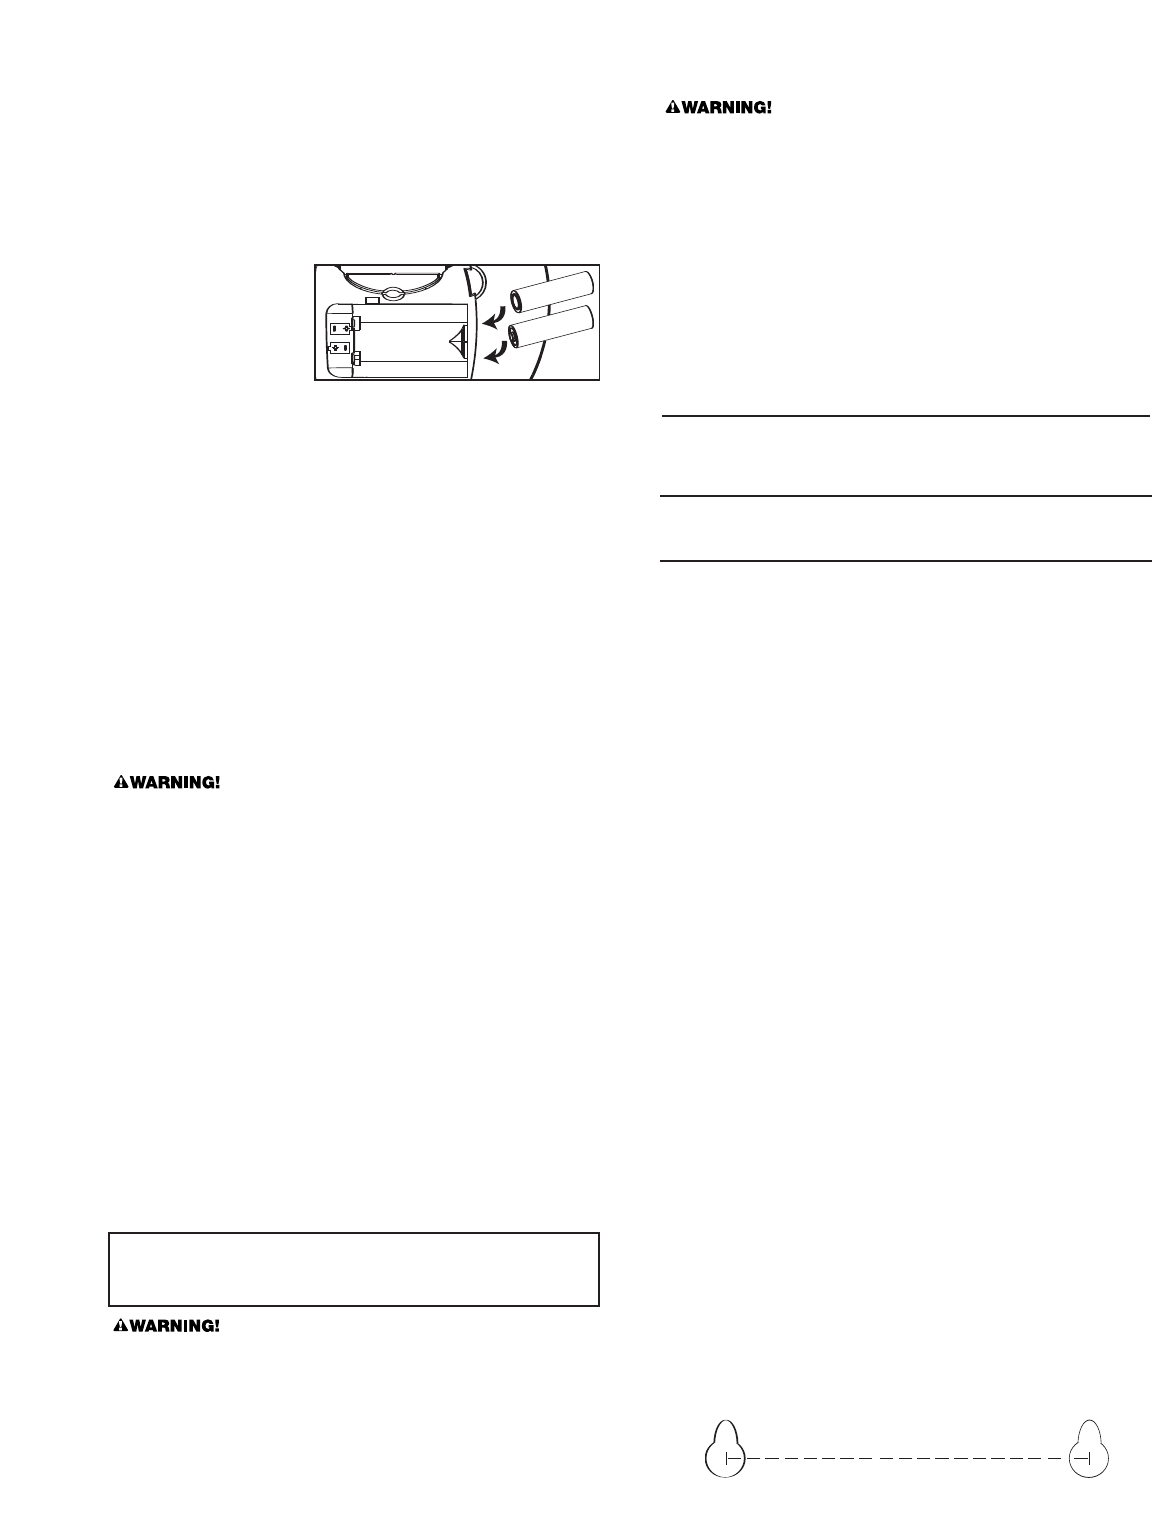
INSTALLING THE AA BATTERIES
1.
Flip the battery door down to open.
2. Install both AA batteries
(included) inside the battery
compartment as indicated.
Make sure the “+” and “–”
ends of each battery ar
e
aligned properly. A chirp
will be issued.
3.
Close the battery door.
HOW TO INSTALL YOUR CO ALARM
Read “Where To Install Your CO Alarm” before starting.
Before you start installation,
find the pair of self-adhesive labels included
with this CO Alarm. On each label write in the phone number of your emer
-
gency r
esponder (like 911) and a qualified appliance technician. Place one
label near the CO Alarm, and the other label in the “fresh air” location you
plan to go if the alarm sounds.
IF YOUR CO ALARM SOUNDS
Actuation of your CO Alarm indicates the presence of carbon monoxide
(CO) which can kill you. In other words, when your CO Alarm sounds,
you must not ignore it!
IF THE ALARM SIGNAL SOUNDS:
1. Operate the Test/Silence button.
2. Call your emergency services, fire department or 911. Write down the
number of your local emergency service here:
__________________________________________________________________
3. Immediately move to fresh air—outdoors or by an open door or window.
Do a head count to check that all persons are accounted for
. Do not re-
enter the pr
emises, or move away from the open door or window until the
emergency services responder has arrived, the premises have been aired
out, and your CO Alarm remains in its normal condition.
4. After following steps 1-3, if your CO Alarm reactivates within a 24-hour
period, repeat steps 1-3 and call a qualified appliance technician to inves-
tigate for sources of CO from fuel-burning equipment and appliances,
and inspect for pr
oper operation of this equipment. If problems are iden-
tified during this inspection have the equipment serviced immediately.
Note any combustion equipment not inspected by the technician, and
consult the manufacturers’ instructions, or contact the manufacturers
directly, for more information about CO safety and this equipment.
Make sur
e that motor vehicles ar
e not, and have not, been operating in
an attached garage or adjacent to the residence. Write down the number
of a qualified appliance technician here:
_________________________________________________________________
Alar
ms have various limitations. See "General Limitations of CO Alar
ms"
for details.
USING THE SILENCE FEATURE
•
The Silence Feature is for your convenience only and will not
cor
rect a CO problem. Always check your home for a potential
problem after any alarm. Failure to do so can result in injury or
death.
•
NEVER remove the batteries from your CO Alarm to silence the
horn. Use the silence feature. Removing the batteries removes
your pr
otection! See “If Your CO Alarm Sounds” for details on
r
esponding to an alarm.
The Silence Featur
e is intended to temporarily silence your CO Alarm’s alarm
horn while you correct the problem—it will not correct a CO problem. While
the alarm is silenced it will continue to monitor the air for CO.
When CO r
eaches alarm levels the alarm will sound— repeating horn pattern:
4 beeps, a pause, 4 beeps, etc. Pr
ess and hold the Test/Silence button until
the horn is silent. The initial Silence cycle will last approximately 4 minutes.
NOTE: After initial 4-minute Silence cycle, the CO Alarm re-evaluates present
CO levels and responds accordingly. If CO levels remain potentially danger-
ous—or start rising higher—the hor
n will start sounding again.
While the detector is silenced:
If the CO Alarm...
Is silent for only 4 minutes, then
starts sounding loudly—4 beeps,
pause, 4 beeps, pause
This means...
CO levels are still potentially
danger
ous.
If the CO Alar
m...
Remains silent after you pr
essed
the Test/Silence button
This means...
CO levels ar
e dropping.
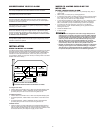
TO MOUNT ON THE WALL
T
ools you will need:
pencil, drill with 3/16” or 5mm drill bit,
flathead screwdriver, hammer.
1. Choose a location on the wall. Do not install the Alarm closer than 4”
(102 mm) fr
om where the wall meets the ceiling.
2.
Hold the mounting guide template against the wall, and make a mark
inside each keyhole wher
e you will drill your mounting hole as shown in
the diagram below.
3. Use a 3/16” (5 mm) drill bit to drill through the marks you made for the
mounting holes.
4.
Insert the plastic screw anchors into the mounting holes until they are
flush with the wall. If necessary, tap them gently with a hammer.
5. Insert the screws into the anchors until the screwhead is 1/8 inch (3 mm)
away from the wall.
6. Slide the CO Alarm onto the scr
ews until you feel it click into place.
7. Test the CO Alarm as described in “Weekly Testing.”
“ALARM-MOVE TO FRESH AIR”
If you hear the alarm horn and the Red light is flashing,
move ever
yone to a source of fresh air.
DO NOT disconnect the batteries from the CO Alarm!
SILENCING THE LOW BATTERY WARNING
This silence feature can temporarily quiet the low battery warning “chirp” for
up to 8 hours. Y
ou can silence the low battery warning “chirp” by pressing
the T
est/Silence button. The LED will flash twice, acknowledging that the low
battery silence feature has been activated.
After 8 hours, the low battery “chirp” will resume.
Replace the batteries as
soon as possible; this unit will not operate without battery power!
To deactivate this feature:
Press the Test/Silence button again. The unit will
go into Test Mode and the low battery warning will resume (LED flashes and
unit sounds “chirp” once a minute.)
If you cannot silence the low battery warning, replace the batteries
immediately.
3.875 inches
3.875 inches
Mounting Guide Template
2.5 inches (64 mm)


Find Your Products By Category
- Computer Equipment
- Portable Media
- Photography
- Car Audio and Video
- TV and Video
- Household Appliance
- Automotive
- Communications
- Kitchen Appliance
- Laundry Appliance
- Home Audio
- Lawn and Garden
- Power Tools
- Musical Instruments & Equipment
- Baby
- Personal Care
- Video Game
- Marine Equipment
- Fitness & Sports
- Outdoor Cooking
- Cell Phone
Please Login
