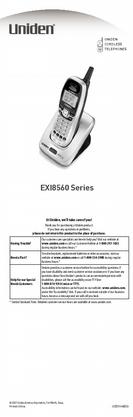

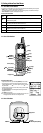
5.0
Owner's of the Uniden Cordless Telephone EXI8560 gave it a score of 5.0 out of 5. Here's how the scores stacked up:


Sheet 9
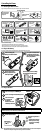
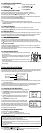
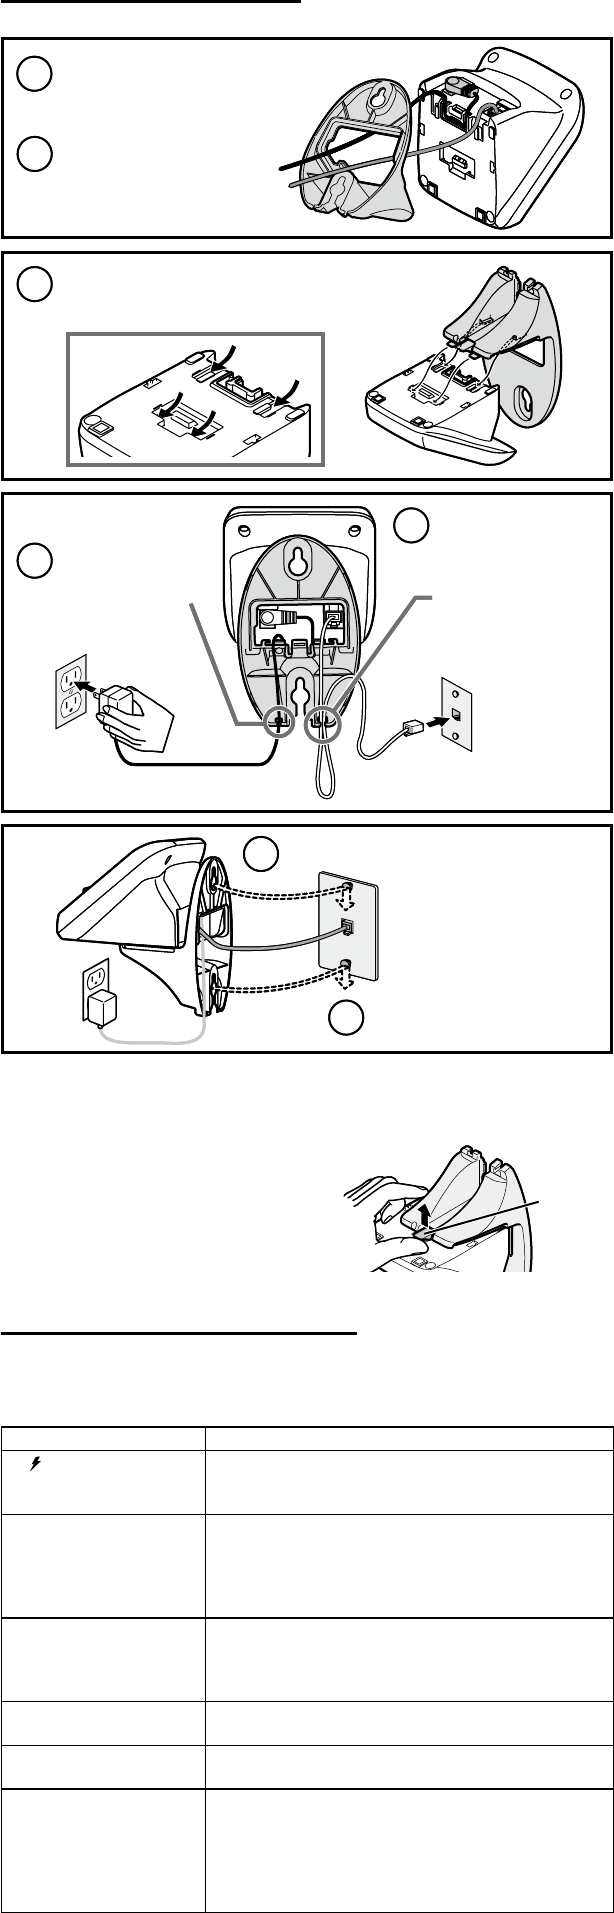
7) Mounting the Base on a Wall
You can mount the phone on any standard telephone jack wall plate.
1
Route the AC adapter and the telephone
cords through the hole of the wall
mount bracket.
2
Connect the AC adapter and the
telephone cords as shown.
Remember to route the AC adapter
cord through the channel.
3
Line up the four tabs on the wall mount bracket (two at the top and
two at the bottom) with the four notches on the bottom of the base.
Slide the bracket into place.
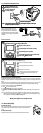
6
Place the mounting slots over the pins on the wall plate.
7
Slide the base down to lock it into place.
4
Hook the AC adapter cord
into the smaller notch at
the bottom of the bracket,
and let the cord hang
below the bracket.
5
Plug the telephone cord
into the wall jack.
Hook both sides of the
telephone cord into the
larger notch
OR
tuck the excess cord into the
open space in the bracket.
Wall plate
Wall plate
To AC outlet
AC adapter (supplied)
To telephone
wall jack
Telephone cord (supplied)
1
Route the AC adapter and the telephone
cords through the hole of the wall
mount bracket.
2
Connect the AC adapter and the
telephone cords as shown.
Remember to route the AC adapter
cord through the channel.
3
Line up the four tabs on the wall mount bracket (two at the top and
two at the bottom) with the four notches on the bottom of the base.
Slide the bracket into place.
6
Place the mounting slots over the pins on the wall plate.
7
Slide the base down to lock it into place.
4
Hook the AC adapter cord
into the smaller notch at
the bottom of the bracket,
and let the cord hang
below the bracket.
5
Plug the telephone cord
into the wall jack.
Hook both sides of the
telephone cord into the
larger notch
OR
tuck the excess cord into the
open space in the bracket.
Wall plate
Wall plate
To AC outlet
AC adapter (supplied)
To telephone
wall jack
Telephone cord (supplied)
Note: To mount the phone directly on the wall, insert two 1
3
/
8
inch, #10 screws (not supplied) into the wall
using anchors suitable for the wall material. Place the screws 3
15
/
16
inches apart, and allow
1
/
8
inch free
space between the wall and screw heads.
To remove the wall-mount bracket
At the bottom of the base, lift up on the release latch and
push the bracket up.
Release latchRelease latch
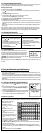
8) Troubleshooting and Maintenance
8-1. Solving Common Issues
If your phone is not performing to your expectations, please try these simple steps rst. If these steps do not
solve your problem, please call our Customer Hotline. See back cover page for contact information.
When you have this problem…
Try…
The /in use LED won't turn on
when the handset is placed in the
cradle.
Checking the AC adapter connection.
Re-seating the handset in the cradle.
Cleaning the charging contacts on the handset (See section 8-8).
•
•
•
The audio sounds weak and/or
scratchy.
Moving the handset closer to the base.
Moving the handset and/or base away from metal objects or
appliances and try again.
Changing the channel by pressing [select/channel] during a call.
This can help eliminate background noise.
•
•
•
The phone can't make or receive
calls.
Checking the telephone cord connection.
Disconnecting the AC adapter. Wait a few minutes, then reconnect it.
Asking your telephone company if they use pulse dialing (See section
1-4).
•
•
•
The handset can make calls, but it
doesn’t ring.
Making sure the ringer isn’t turned o (see section 3-5).•
The handset’s display doesn’t show
anything.
Charging the battery for 15-20 hours.
Checking the battery pack connection.
•
•
There’s a lot of static during calls.
Changing the channel by pressing [select/channel] during a call to
help eliminate background noise.
Keeping the handset away from microwave ovens, computers, remote
control toys, wireless microphones, alarm systems, intercoms, room
monitors, uorescent lights, and electrical appliances.
Moving the base to a better location (see section 1-1).
•
•
•


Find Your Products By Category
- Computer Equipment
- Portable Media
- Photography
- Car Audio and Video
- TV and Video
- Household Appliance
- Automotive
- Communications
- Kitchen Appliance
- Laundry Appliance
- Home Audio
- Lawn and Garden
- Power Tools
- Musical Instruments & Equipment
- Baby
- Personal Care
- Video Game
- Marine Equipment
- Fitness & Sports
- Outdoor Cooking
- Cell Phone
Please Login
