
0
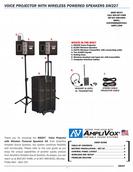
Owner's of the AmpliVox Speaker System SW227 gave it a score of 0 out of 5. Here's how the scores stacked up:
2
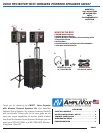
SW227
BATTERY
DOOR PANEL
BATTERY
DOOR PANEL
S1670
TRANSMITTER
WITH CABLE
AMPLIFIER
CONTROL
PANEL
AMPLIFIER
CONTROL
PANEL
HANDLE
HANDLE
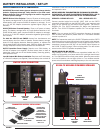
BATTERY INSTALLATION / SET-UP:
INSTALL POWER SUPPLY IN ALL COMPONENETS:
IMPORTANT! Do not mix battery types or attempt to recharge alkaline
batteries. Equipment dammage, safety hazard or fire could result.
Remove batteries if the unit is not going to be used for long periods
of time to prevent leakage.
SW225 Wireless Voice Projector: Runs on AC power or battery power.
The battery carriage holds 10 D-cell alkaline batteries or our S1465
NiCad battery pack (requires S1460 AC adapter to recharge). Or run
on a 12 Volt DC adapter (automotive cigarette lighter plug-in, not
included).
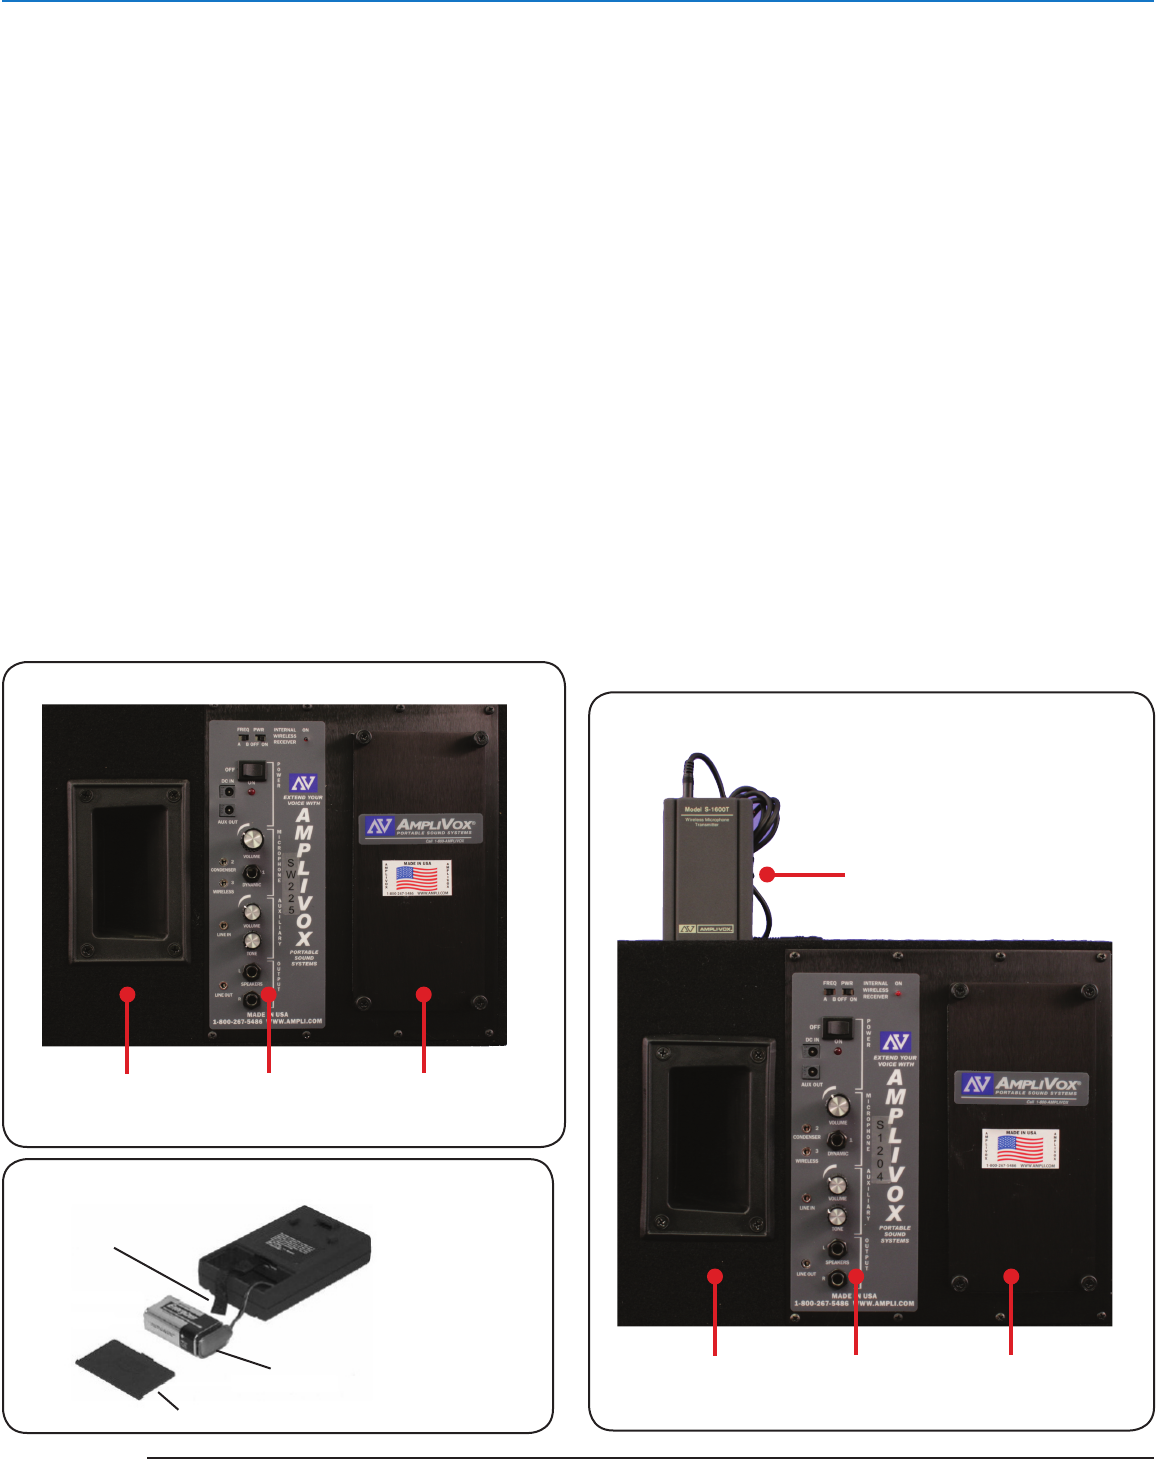
S1204-70 Wireless Powered Speaker: Runs on AC power or battery
power. The battery carriage holds 10 D-cell alkaline batteries or our
S1465 NiCad battery pack (requires S1460 AC adapter to recharge).
Or run on a 12 Volt DC adapter (automotive cigarette lighter plug-in,
not included).
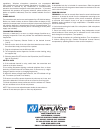
For both the 1204-70 and SW225: Loosen four thumbscrews and
remove battery door from back of speaker. Remove battery carriage.
Insert 10 D-cell alkaline batteries, observing polarity, or replace with
fully charged S1465 NiCad battery pack. Carefully replace the battery
carriage. Reposition battery door and fasten the thumbscrews.
S1670 Transmitter Power Supply: Requires one 9-Volt battery or
a 9-Volt AC adapter (not supplied). Remove battery door on back of
transmitter. insert one new 9 volt alkaline battery, observing polarity,
and replace the door.
Lapel & Headset Mic Battery Installation: Requires one 9-Volt battery
or a 9-Volt AC adapter (not supplied). Remove battery door on back of
9V DC ALKALINE
BATTERY
RIBBON FOR
BATTERY REMOVAL
PLEASE NOTE:
YOU HAVE TWO
SEPERATE
TRANSMITTERS
ONE IS FOR THE
SPEAKER AND THE
OTHER IS FOR THE
MICROPHONE.
SPEAKER = 169
MIC = 171
BATTERY COVER
SW225 VOICE PROJECTOR
S1204-70 WIRLESS POWERED SPEAKER
TRANSMITTER BATTERY INSTALLATION
transmitter. insert one new 9 volt alkaline battery, observing polarity,
and replace the door.
SET-UP WIRELESS TRANSMITTER FOR THE S1204-70 SPEAKER:
PLEASE NOTE: YOU HAVE TWO SEPERATE TRANSMITTERS. ONE IS
FOR THE SPEAKER AND THE OTHER IS FOR THE MICROPHONE.
SPEAKER = BEGINS WITH 169 MIC = BEGINS WITH 171
Connect provided cable from the MIC INPUT JACK on the S1670
transmitter (labled 169) into the LINE OUT JACK (*see image on next
page) on the Amplifier on the SW225 Voice Projector. Turn SW225
Amplifier ON. Turn S1670 transmitter ON. Make sure frequencies
MATCH. Turn S1204-70 Speaker Amplifier ON. The red light should
illuminate.
NOTE: If for any reason the S1670 transmitter frequency is changed
from its factory set position A please reset to A. The internal wireless
receiver is preset to A.
NOTE: The frequencies used by the S1204-70 Speaker and the S1670
transmitter are not on clear channels adn may be used by other devices.
If the unit receives interference and if you are unable to use the S1670
transmitter, connect the LINE OUT on the SW225 Voice Projector to
the S1204-70 LINE IN using a 3.5mm miniplug cable. Turn the volume
control on the S1204-70 speaker completely down.
SW225 WIRELESS MIC SET UP:
Plug headset or lapel microphone into transmitter labled with 171,
select A or B frequency, turn power switch ON. A red light should come
on. Turn SW225 on with the main power switch. When the power switch
is in the ON position, the red light will be on. Turn wireless receiver
power switch on and select matching frequency to the mic transmitter,


Find Your Products By Category
- Computer Equipment
- Portable Media
- Photography
- Car Audio and Video
- TV and Video
- Household Appliance
- Automotive
- Communications
- Kitchen Appliance
- Laundry Appliance
- Home Audio
- Lawn and Garden
- Power Tools
- Musical Instruments & Equipment
- Baby
- Personal Care
- Video Game
- Marine Equipment
- Fitness & Sports
- Outdoor Cooking
- Cell Phone
Please Login
