
0
Owner's of the AmpliVox Stereo Amplifier SW805A gave it a score of 0 out of 5. Here's how the scores stacked up:


No Sound?
1. Make sure the amp’s power switch is turned on.
The red light next to the power switch should be lit.
2. Make sure the batteries are not dead.
3. Make sure you have not mixed battery types.
Use all alkalines or all nicads.
4. Make sure the polarity (+ or -) of the batteries
is correct. The flat end (-) of the battery touches the
spring.
5. Make sure the cable connecting the battery
holder is not loose.
6. Make sure the speaker plug is securely con-
nected to the speaker jack.
7. Make sure the mic plug is securely connected to
the proper mic jack.
8. Make sure the mic switch is turned on. It’s on
the side of the mic.
9. Make sure the mic volume is turned up. Don’t
turn up the auxiliary line in volume by mistake.
10. If you have a condenser mic, make sure it is
plugged into the condenser mic jack and not the
wireless mic jack.
11. If you are using the optional International AC
Adapter/Recharger instead of batteries, make sure
the cables are securely connected and the electri-
cal outlet is working. Bending the prongs in or out
a bit may help.
12. If you are using the optional International AC
Adapter/Recharger, make sure it is plugged into
the AC/DC in jack and not the lamp jack.
13. A brand new cable is most likely o.k., but over
time a cable can become damaged from too much
flexing near the plugs.
Quick Setup Instructions
1. Batteries Install 10 fresh Alkaline batteries or
rechargeable AmpliVoxNiCad Battery Pack
(S1465)
OR
Plug optional International AC Adapter/ Recharger
power supply (S1460) into the AC/DC jack on the
amp. Plug into a working electrical outlet.
2. Mic Jack. Plug AmpliVox’s wired, hand-held
mic into the dynamic mic jack on the amp. Or plug
AmpliVox’s lapel or headset mic into the con-
denser mic jack.
3. Mic Switch. Turn the mic switch on. The switch
is on the side of the mic.
4. Speaker. Plug the speaker into either speaker
jack on the amp.
5. Power Switch. Turn the power switch on; red
light is lit.
6. Volume. Adjust mic volume knob (not auxiliary
volume knob.)
7. Speak! Congratulations! You are the proud
owner of a terrific, new AmpliVox sound system.
You have the power to speak.
The amp uses 10 D-cell Alkaline (AmpliVox
S-1430) batteries; or the rechargeable AmpliVox
NiCad Battery Pack (S-1465). Batteries are sold
separately.
The removable plate on the back of the amp is
designed to stay closed until you need to change
the batteries. Slip a finger nail under it and slide it
out.
Lift the battery holder out. The plastic dividers
between the batteries help prevent battery corro-
sion.
Be sure to observe the polarity when putting
batteries in the battery compartment. The negative
(flat) ends go against the springs.
The battery cable comes from the factory
already plugged into the connector. If it comes
loose, push it in securely. (Turn the plug over if it
doesn’t fit; it only fits one way.)
The AmpliVox NiCad Battery Pack (S-1465) can
be recharged with the optional International AC
Adapter/Recharger (S-1460.)
Screeching Sounds?
Howlback, sometimes called feedback, is the
howl or screech often heard in sound amplification
systems. (Impress your friends with that technical
term!) It will definitely get your audience’s atten-
tion, though the traditional tap on the water glass
is usually a better way.
Howlback is caused by sound from the loud-
speaker returning to the microphone. AmpliVox
systems are designed to minimize howlback,
unfortunately it can never be entirely eliminated.
Here are some things you can do to minimize
howlback. Your audience will thank you.
1. Don’t touch the head of the mic. Hold the mic
away from the mic head.
2. Keep the loudspeakers turned toward the audi-
ence. Sound can easily be reflected off a hard sur-
face, so keep trying if the first position doesn’t
help.
3. Try standing in a different position on stage to
minimize reflected sound entering the mic.
4. Turn down the volume. You can compensate by
speaking louder or closer to the mic.
5. Test your sound system before your audience
arrives, preferably where you will be speaking. But
even a little practice in your office will help famil-
iarize you with the mic and the amp controls.
Installing or Replacing
Batteries
Many AmpliVox Accessories
Are Available
Enhance the performance of your AmpliVox
sound system with genuine AmpliVox accessories.
More Important Info
Hold the mic more vertically; not directly in front of
your mouth like a rock star. This will help eliminate
popping sounds. Try saying, “Peter Piper picked a
peck of pickled peppers” with the mic directly in
front of your mouth. The vertical position also
makes the mic last longer because there is less
condensation from your breath inside the mic. (I
know you’re wondering why rock stars can eat the
mic and you can’t. It’s because they use a different
kind of mic and do they really care how long it
lasts?)
WARNING:
Never mix different types of batter-
ies. Never recharge alkaline bat-
teries. You could cause an electrical
short, battery leakage and/or cor-
rosion which will damage your
equipment and void your warranty.
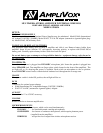
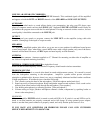
Lapel Mic S-2030
Headset Mic S-2040
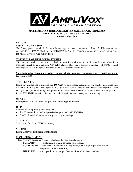
Wireless
Transmitter &
Receiver
Dual Speaker Module S-1201
& Tripod S-1080
Horn Speaker
S-1260
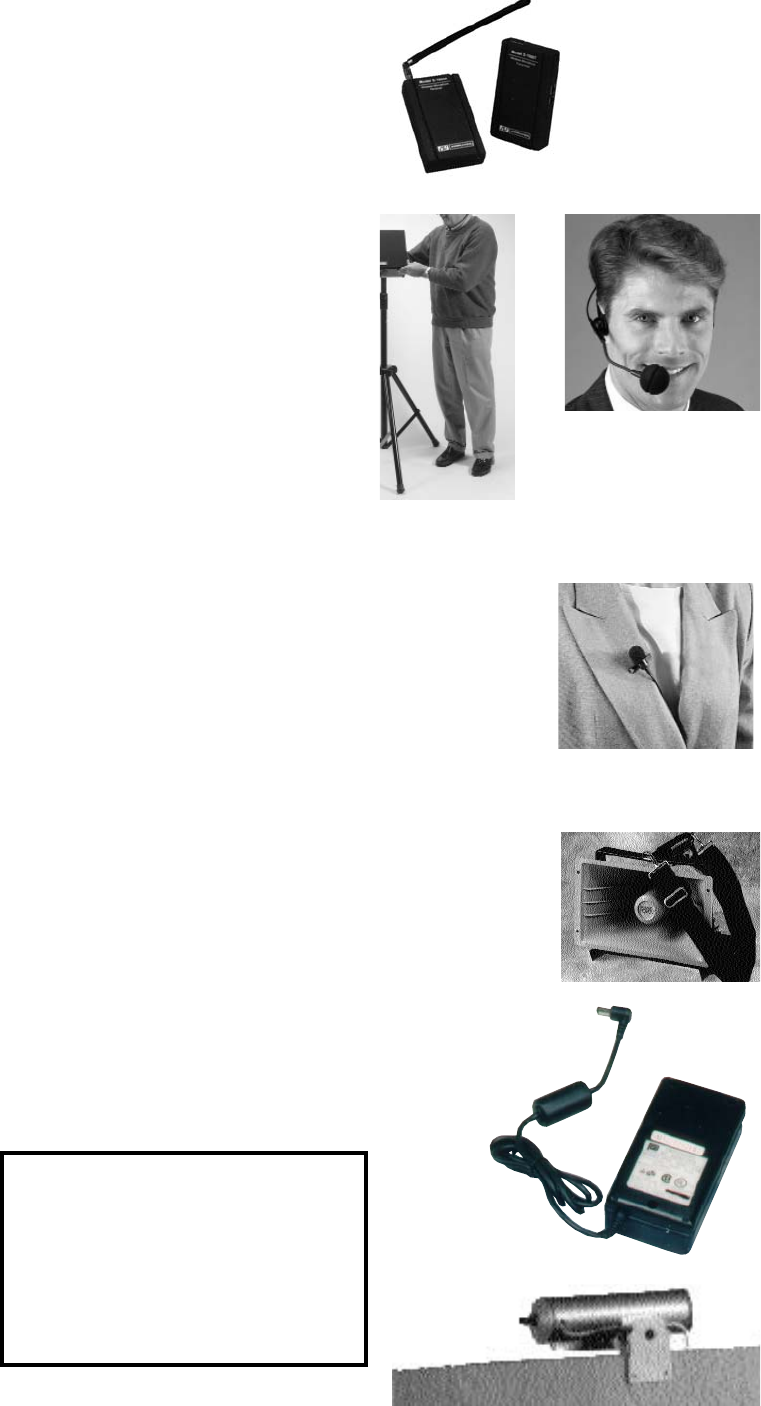
Reading Light S-1100
International A/C
Adapter/Recharger
S-1460 (15 V)
Published\Directions\850dir 4/13/98


Find Your Products By Category
- Computer Equipment
- Portable Media
- Photography
- Car Audio and Video
- TV and Video
- Household Appliance
- Automotive
- Communications
- Kitchen Appliance
- Laundry Appliance
- Home Audio
- Lawn and Garden
- Power Tools
- Musical Instruments & Equipment
- Baby
- Personal Care
- Video Game
- Marine Equipment
- Fitness & Sports
- Outdoor Cooking
- Cell Phone
Please Login
