

4.3
Owner's of the Brother Sewing Machine XL 2600i gave it a score of 4.3 out of 5. Here's how the scores stacked up:

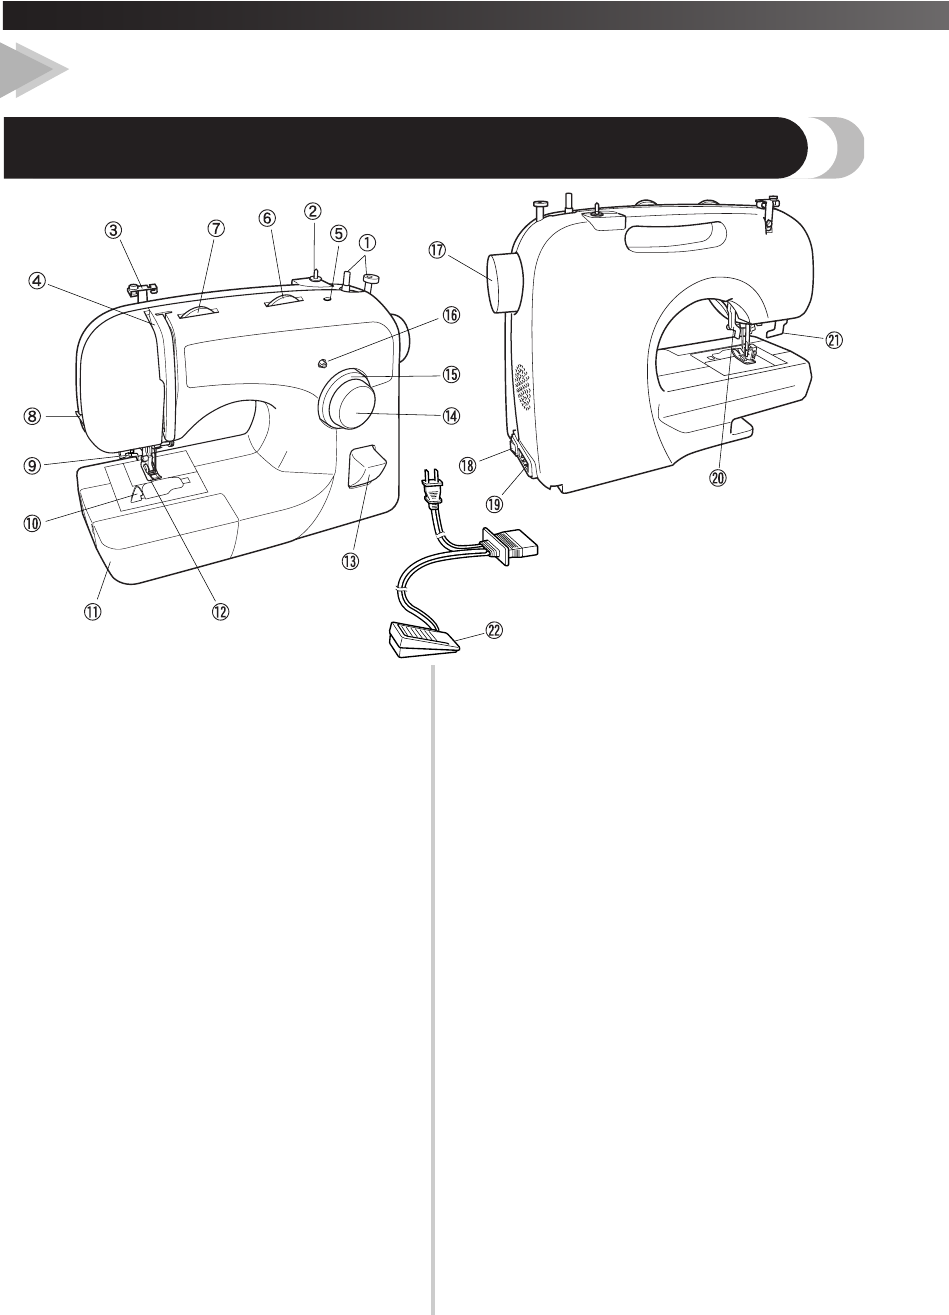
KNOWING YOUR SEWING MACHINE /
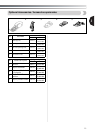
—
——————————————————————————————————————
—
10
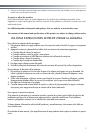
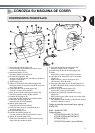
KNOWING YOUR SEWING MACHINE
THE MAIN PARTS
1 Bobbin winder (page 26)
This winds the thread onto the bobbin for use as the
lower thread.
2 Spool pin (page 27, 32)
This holds the spool of thread.
3 Thread guide (page 27, 32)
This is used when winding the thread onto the bobbin
and then threading the machine.
4 Thread take-up lever (page 33)
5 Hole for extra spool pin (page 37)
This holds a second spool of thread for sewing with the
twin needle.
6 Stitch width dial (page 25)
This controls the stitch width.
7 Upper tension-control dial (page 38)
This controls the tension of the upper thread.
8 Thread cutter (page 43)
Pass the threads through the thread cutter to cut them.
9 Needle threader (page 34)
(This is only available on certain models.)
0 Quick-set bobbin (page 30)
(This is only available on certain models.)
A Flat bed attachment with accessory compartment
(page 19)
B Presser foot (page 18)
C Reverse sewing lever (page 25)
You can push this to stitch in the reverse direction.
D Pattern selection dial (page 20)
You can turn this in either direction to choose the stitch
you want.
E Stitch length dial (page 24)
This controls the stitch length.
F Buttonhole fine-adjustment screw (page 54)
G Handwheel
Used to manually raise and lower the needle.
H Main power and sewing light switch (page 15)
You can turn the main power and sewing light switch
on and off.
I Foot controller jack / socket (page 15)
Plug in the foot controller plug and connect the
machine to the power supply.
J Presser foot lever (page 32)
Used to raise and lower the presser foot.
K
Buttonhole lever (1-Step automatic buttonhole) (page 52)
Lower the buttonhole lever when sewing buttonholes.
L Foot controller (page 15)
You can use this to control the sewing speed, and to
start and stop sewing.
Parts Code for Zigzag Presser Foot: XC4901-051
Foot Controller: Model KD-1902
Parts Code: XC7359-022 (110/120V Area)
XC7438-222 (220/240V Area)
XC7456-222 (U.K.)
XC7455-022 (Australia, New Zealand)
1


Find Your Products By Category
- Computer Equipment
- Portable Media
- Photography
- Car Audio and Video
- TV and Video
- Household Appliance
- Automotive
- Communications
- Kitchen Appliance
- Laundry Appliance
- Home Audio
- Lawn and Garden
- Power Tools
- Musical Instruments & Equipment
- Baby
- Personal Care
- Video Game
- Marine Equipment
- Fitness & Sports
- Outdoor Cooking
- Cell Phone
Please Login
